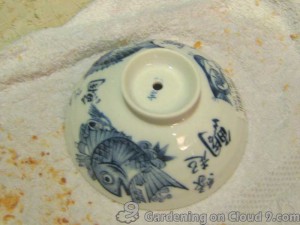
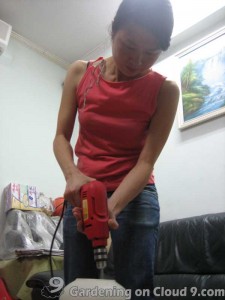
 We know that good drainage is the key to healthy plants, but the containers that we find most attractive are often the ones without drainage holes. But we can drill the drainage holes by ourselves, and it is much easier than what most of us would expect. All we need is an electric drill and steady hands.
And here, let me show you how to drill holes on our containers.
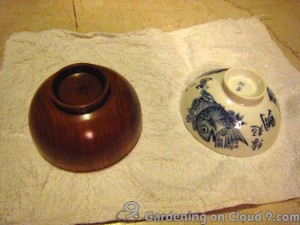
Place a Wet Cloth on a Hard Level Surface
While some would suggest you to place a thick piece of cardboard between the hard level surface and the container, I would recommend a piece of wet cloth instead. The wet cloth can keep your pot from sliding.
Turn your pot upside down and place it on the wet cloth.
Mark Your Targets
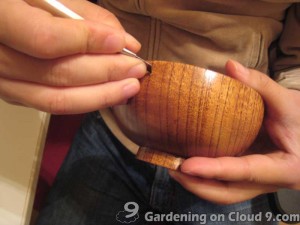
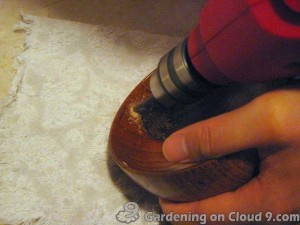
Use a nail to make a little ding at where you want to drill the hole to prevent the bit from slipping and nicking the pot when you are drilling the hole. While it is relatively easy to make a ding on pots that are made of terra-cotta, wood, metal, and such, it is more difficult to do the same on ceramic or glass pot. In this case, I would just mark the target with a marker.
Choose the Right Drill Bit
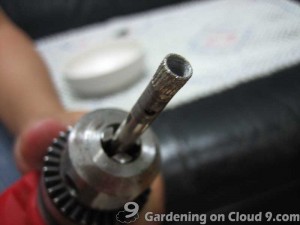
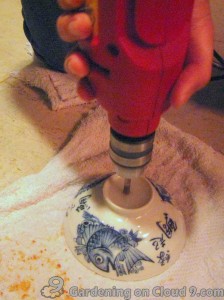
It is very important to choose the right drill bit for you will likely to crack your pot if you use a wrong one. For glass and ceramic pots, I use the drill bit that is shown in the photo above. I don’t know what it is called or if it is especially designed for glass and ceramic, but it works wonders with my glass and ceramic pots.
Drill the Hole
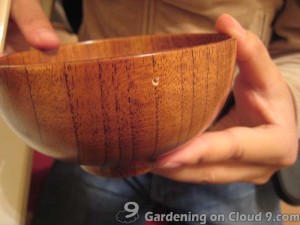
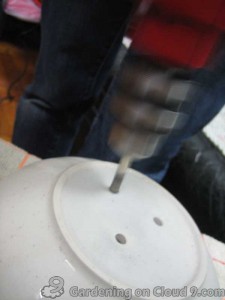
Place the bit into the nick you have made. Make sure the drill bit is straight up and down. Press down lightly on the drill and then drill through the container in a steady motion. To prevent your drill bit from slipping around, you can first drill a shallow “lead hole” with a smaller drill bit, then, drill all the way through with the bigger one.
For Ceramic/Glass Pots – Add Water
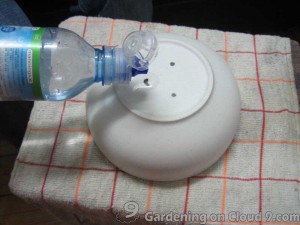
Ceramic and glass pots are relatively easy to crack. To prevent this from happening, we must sprinkle the area where we are drilling with cold water, so to keep the temperature down. In addition, instead of drilling through the container in one single motion, I would suggest you to break it up into several times, so to keep the spot from getting too hot and cracking.
So this is how I drill drainage holes on my containers. Give it a try. It is probably easier that what you think. And once you have mastered the skills, you will have so many more options for your garden containers!


Great how-to. Thanks. And it’s true, the best-looking containers are often those you make yourself.
Thanks for the tips. As you know, I’m in Japan and I have access to a lots of these containers and soup bowls. I’m sure to use some of your tips when I go for indoor plants.
What a helpful post! I was interested to see the drill bit that you use. I usually use the thin, pointy ones. I must look out for the one that you showed.
I am happy that many have found this post helpful 🙂
Sunita – The type of drill bit we use is one of the most important factor, if not the most, especially when we drill on glass containers. I believe it is called porcelain drill bit or diamond drill bit.
Cheers!
I, too, found your post interesting! I’ve never thought about doing this! I have purchased many pots without holes and it does make a big difference. What I usually do when there are no drainage holes is add stones or broken up pieces of clay pots to the bottom so water can drain below the soil if it gets too wet. Thanks for this great tip! Jan
Hi Jan,
Same here, I add stones and pieces of clay or glasses at the bottom of the container for better drainage too. I also like to use nutrient syderolite. It absorbs water, improves ventilation. In addition, it’s clean and reusable 🙂
[…] Wong presents Guidelines and Basic Tips of Drilling Drainage Hole on Garden Container | Gardening on Cloud 9 posted at Gardening on Cloud 9, saying, “We know that good drainage is the key to healthy […]
Is there anyway to drill a hole in a container that has been planted already?
Rhonda, I won’t suggest you to do that. It is so much easier to drill a hole on an empty container than one that is already stuffed with soil and plant 🙂
[…] Wong presents Guidelines and Basic Tips of Drilling Drainage Hole on Garden Container | Gardening on Cloud 9 posted at Gardening on Cloud 9, saying, “We know that good drainage is the key to healthy […]
Thanks for posting this! I recently picked up some beautiful ceramic vases and can’t wait to put plants in them, but first I will drill holes!
Kathy – Yes, many ceramic vases are very beautiful and perfect for container gardening, except that they don’t have a drainage hole. haha. Besides drill holes on them, we can also grow our plant in a plastic pot and place the plastic pot inside the ceramic pot 🙂
[…] Drill | Power ToolsGuidelines and Basic Tips of Drilling Drainage Hole on Garden …Welcome to COOLMAN MalaysiaSaw Core | Art SuppliesDrilling into a modern safe ” […]
[…] – MixxBit Sets | Power ToolsDiy Weir – Tropical Fish ForumsBit Drill | Power ToolsGuidelines and Basic Tips of Drilling Drainage Hole on Garden …Welcome to COOLMAN MalaysiaHandyman Tricks and […]
The drill bit is called a “Diamond Core Drill bit.” Just for reference for people looking for one. ^___^
For further reference.
Recommended Drill Speed (rpm)
Material
Fiberglass
Bit Size
1/2″, 1″, 2″, 3″, 4″
Speed (rpm)
1200, 700, 350, 250, 175
Material
Glass, Ceramic & China
Bit Size
1/2″, 1″, 2″, 3″, 4″
Speed (rpm)
800, 500, 250, 160, 125
Material
Limestone & Marble Stone
Bit Size
1/2″, 1″, 2″, 3″, 4″
Speed (rpm)
600, 450, 225, 130, 100
Material
Granite Stone
Bit Size
1/2″, 1″, 2″, 3″, 4″
Speed (rpm)
400, 300, 150, 100, 75
Hope this is helpful for someone! ^__^
Thanks Akiko 😀
Thanks Akiko 🙂
Wow, I thought I would have to return my clay pot without holes. I fear drilling because I just don’t have the right bit, so the idea of adding stones and broken glass to the bottom of the pot is right up my ally. Thanks!